Screen Printing Workshop; Monday 27th October.

Important Information
- Screens cost £2.
- Yellow Meshed Screen – Paper printing.
- White Mesh – Fabric printing.
- Date screen +1 week.
- Positive needs to be a black as possible.
- Wash inks off as soon as finished.

Method
- Making the Positive
- Coating Screen
- Exposing Screen
- Mixing Inks
- Preparing Print and Table
- Printing
- Adding Colours
Making a Positive.
The positive is a Black and White (printing from a laser-jet/drawing on paper) or Black and Transparent (using acetate) version of the image. It is important that the black is the most black, as this is used to stop the light when exposing the screen, providing a crisp, clear image in the final printing. Can be done using hand drawn methods or the computer. Photoshop tools such as Half Tone can be used to get tonal effects on the prints.
If the final print is intended to be made up of multiple colours then Colour Separation Positives must be produced. A Positive for each ink colour that is going to be used. Each of these must be exposed on a separate screen then the prints can be layered up.
Any Text must be flipped so when it is printed it is the right way around.


Coating Screen.
In the workshop we were printing on to paper so we used screens with a yellow mesh, they have smaller holes so less ink is pushed through. The screen needs to be coated with light-sensitive emulsion, on both sides. This should be done in a room with low lighting. Then left to dry in a dark place. Make sure as to follow instructions for the emulsion being used.
Exposing Screen.


At uni this requires supervision by the technician. Lay the positive on the glass, then lay the screen on top. Technician will set exposure unit to correct time depending on-screen/print type and format of positive. Once exposure is complete, turn off vacuum and gently was both side of screen to remove emulsion, use a sponge as well as power hose. The area of emulsion that is left will be where the light got through, i.e. the white or transparent bits of the positive. (Hopefully).
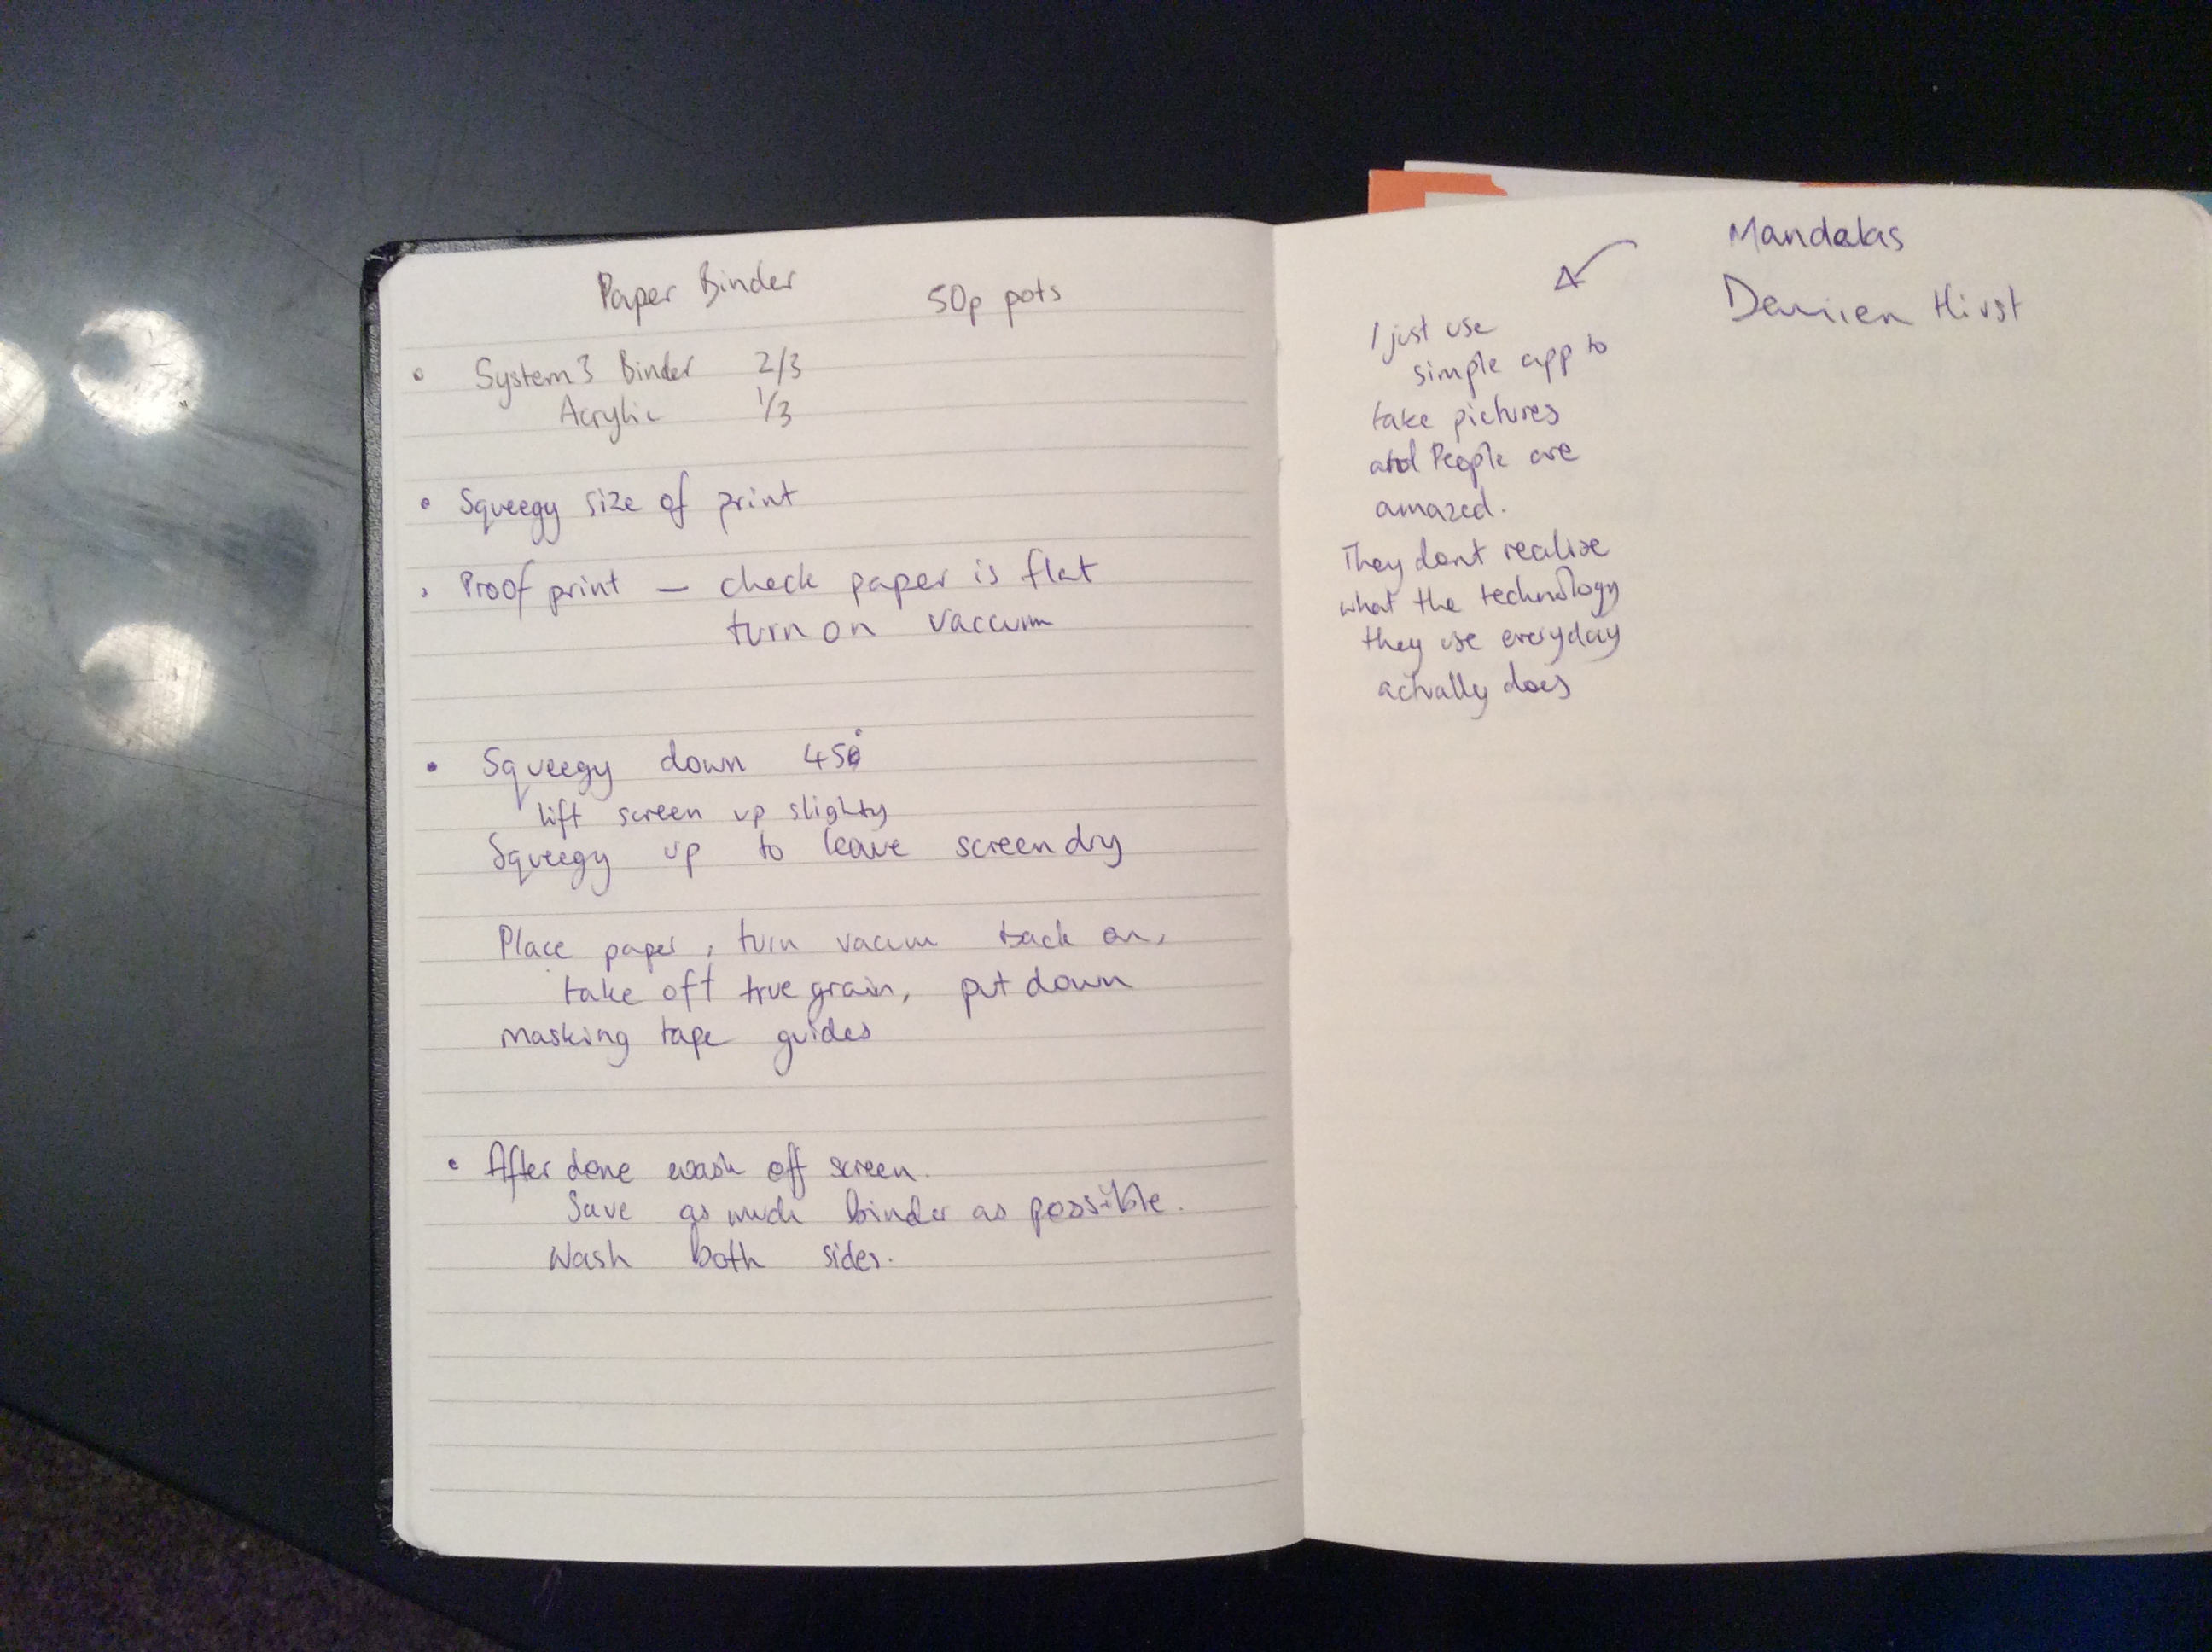
Mixing Inks.
Used System3 Binder mixed with Acrylic Paint. 2 parts binder, 1 part paint. Mixed by eye, we were encouraged to mix our own colour palettes. The first colour I mixed was quite a strong teal colour which gave a lovely print, but as I had not set up my positives for colour separation and was wanting to play around with over laying it was too dark to be the initial layer. After this I mixed up a minty green and used gold as well which left my prints with possibilities for layering.

Preparing Print Table and Printing.
In the print room there are 4 vacuum tables and then a selection of portable tables. It takes time to set up the frame to the size of the screen being used. It is important to properly secure the screen in the frame with the clamps. First step is to make a proof print on to the True Grain, this is to help layering up prints in the correct positions and making registration marks.

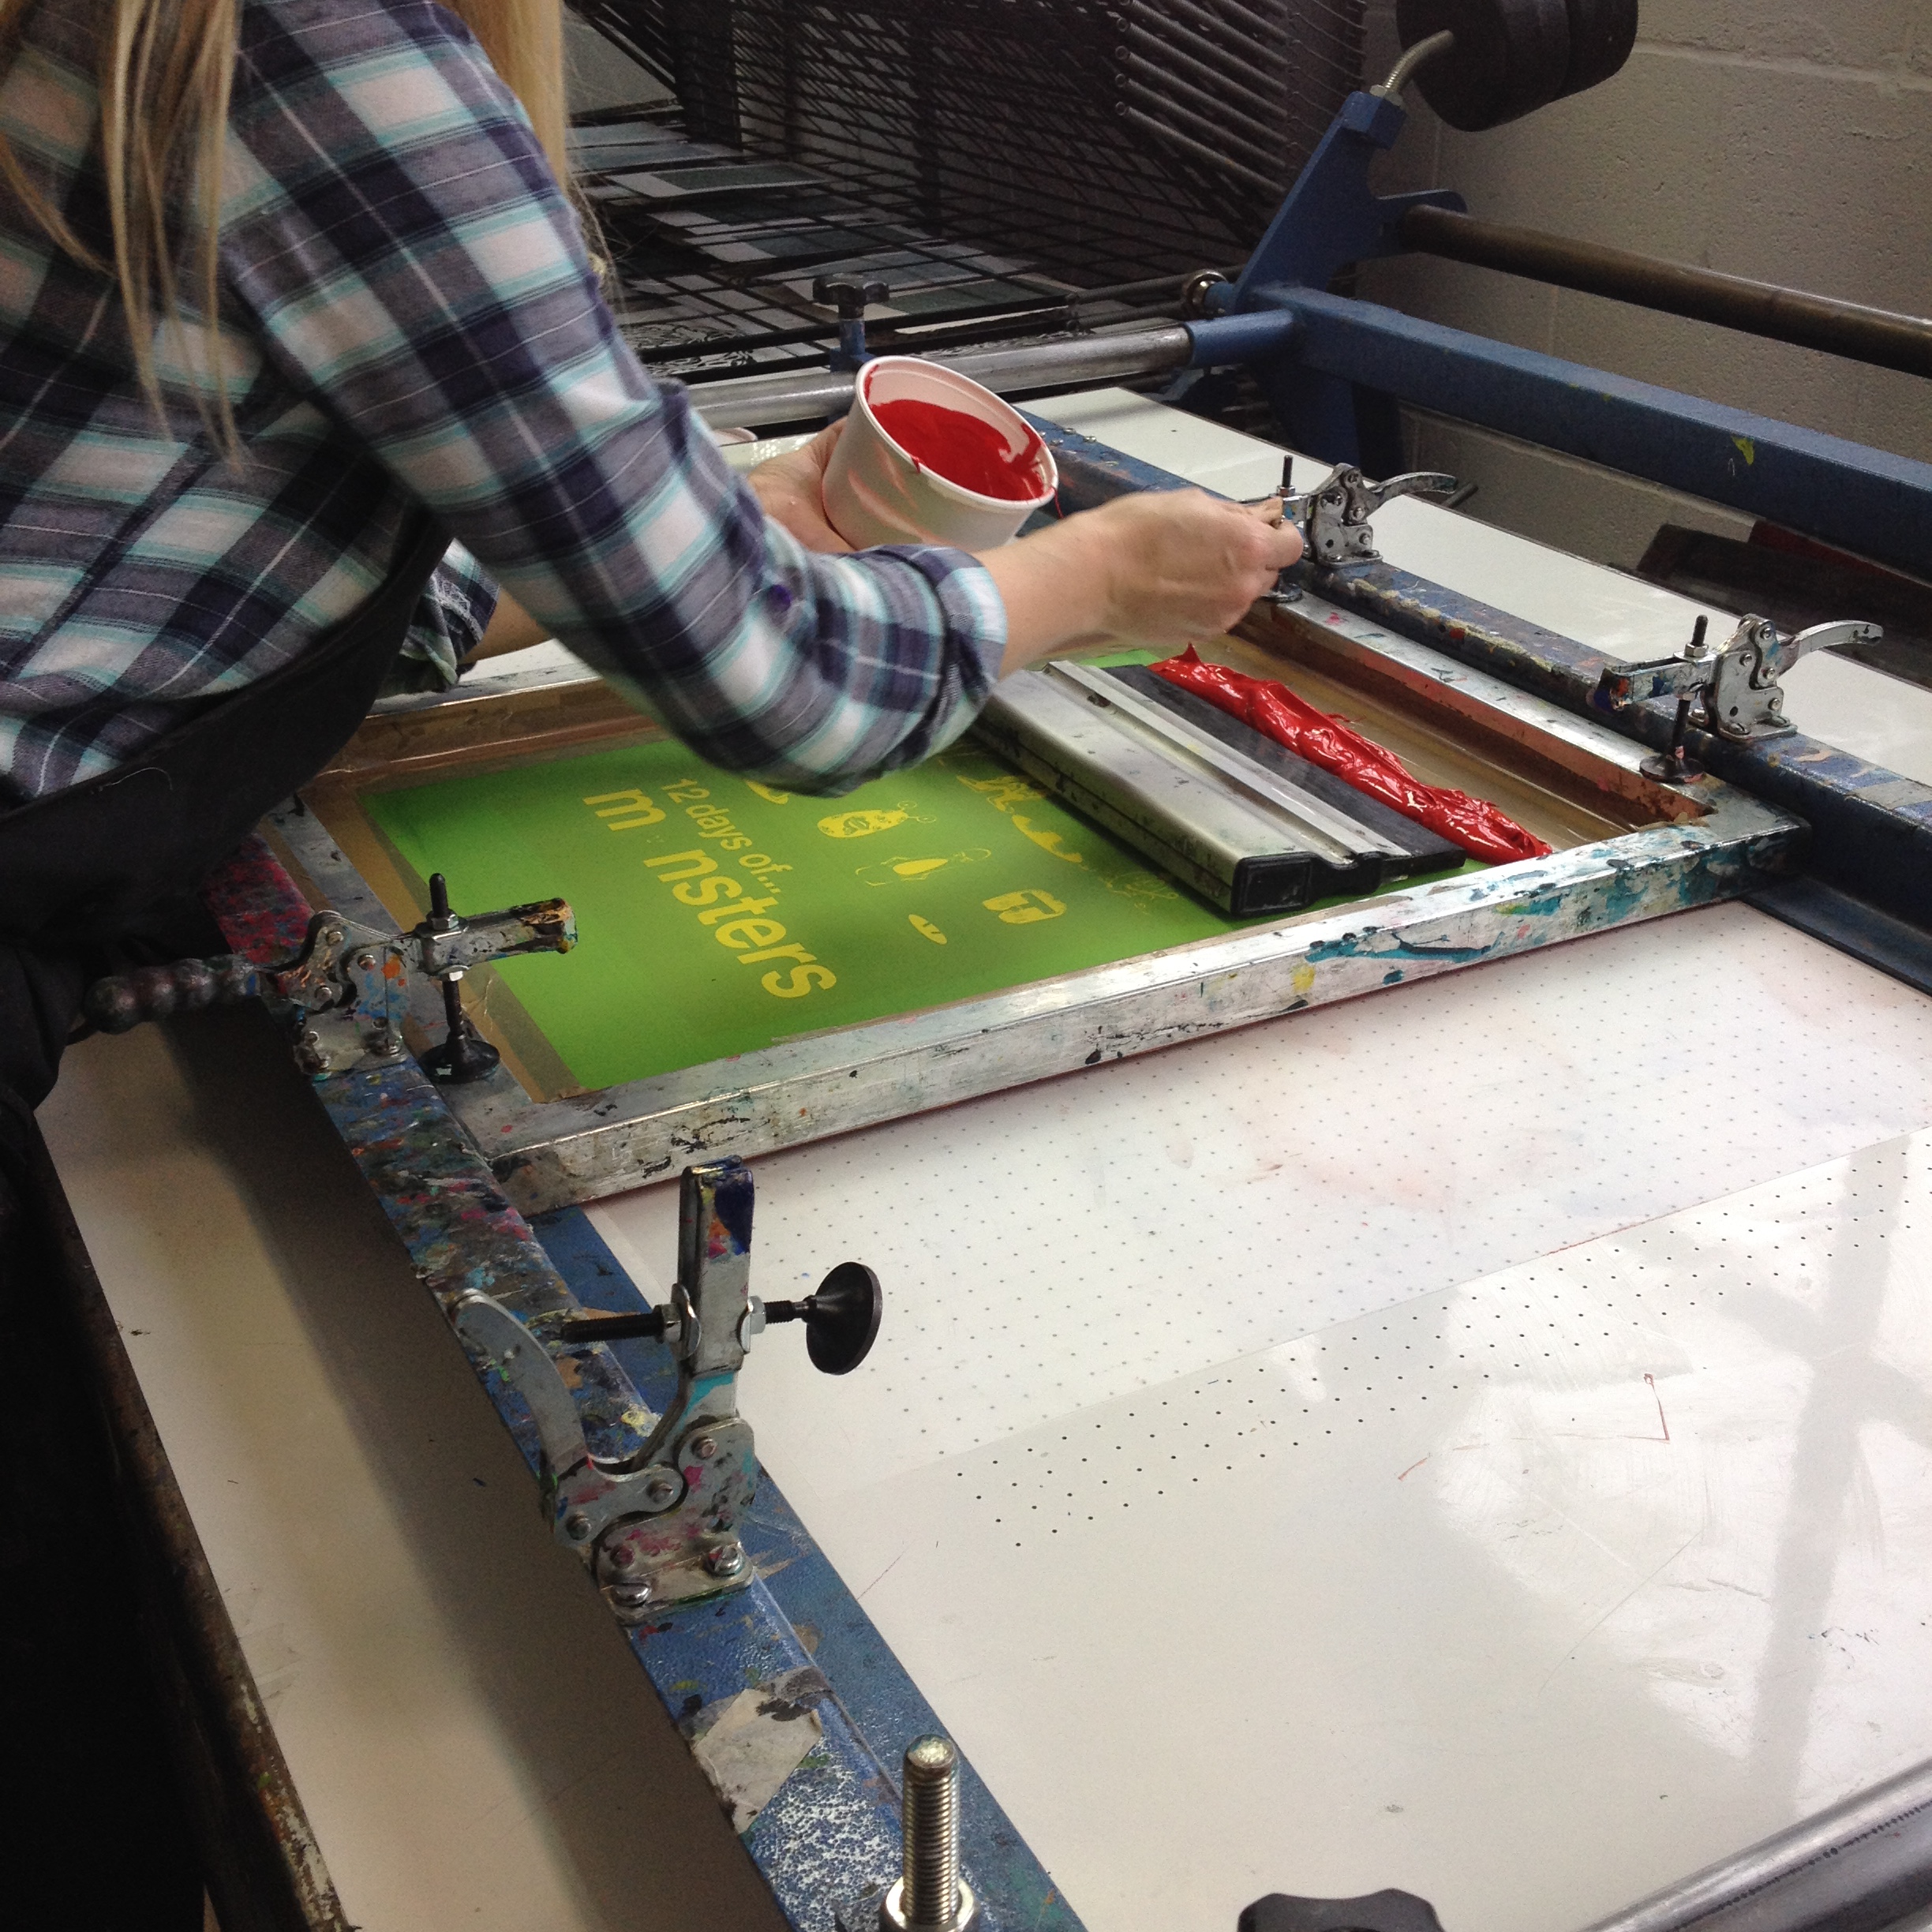
To spread the ink over the screen a rubber squeegee is used, this should be the size of your print, held at a 45º angle and pulled towards you. Lift the screen up slightly and “Flood” the print with the squeegee going in the opposite direction.
Once enough prints have been made with the first colour, save any remaining ink, wash both sides of the screen and the squeegee with power hose and leave to dry. This can then be used with other colours or it is time to move on to the next colour separation.
My Outcomes.
It took a few attempts for me to get a full print of my first design. I think this was because my initial distribution of ink wasn’t even enough and also the way the screen was setup within the frame didn’t give me a smooth “Pull” so the prints came out missing the bottom corners.

After this I moved on to a different design and set the screen in the frame so I had a clearer space. These prints came out a lot better and the green was a lot lighter so I also decided to print two colours together, green and gold.
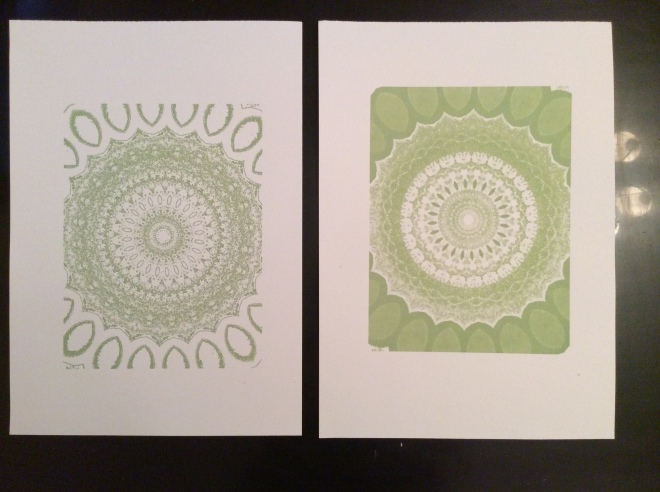


I also printed the prints on to the original positives. Right image – I offset the image slightly to add a movement effect.
I like the boldness the black underneath gives. It also highlights where the positive wasn’t completely black, so during the exposure process the light was let through.


